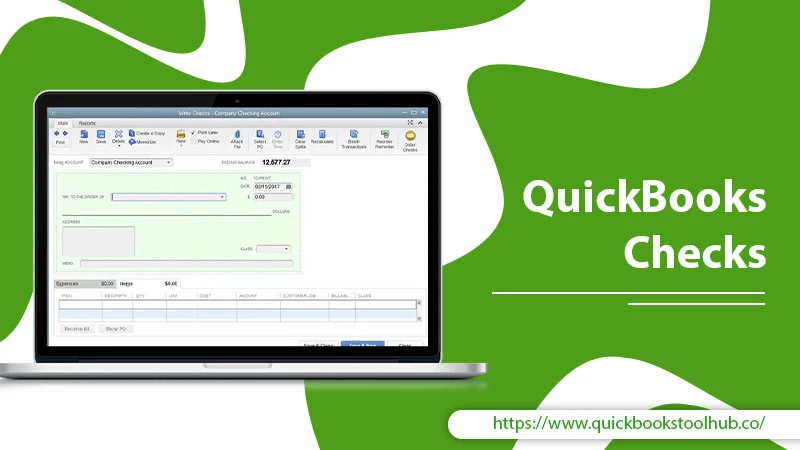
How to Initiate QuickBooks Checks Printing?

For its users, QuickBooks offers a variety of features. The most often utilized feature of print QuickBooks checks. Payroll and accounting-related tasks are printed using these checks. Printing one or more checks is simple for users. Using the QuickBooks Banking menu is a viable option. The Write Checks tab in QuickBooks versions 2015 and later include a tool for printing checks. Users of QuickBooks Online can also similarly print checks. We will outline the steps for QuickBooks online checks printing in this blog post.
How to Print QuickBooks Checks?
As we discuss, QuickBooks offers to print the check on both versions, Desktop and Online. In this portion, we will derive the steps for check printing. Printing checks in QuickBooks is a simple process. You can effortlessly print single and numerous checks in QuickBooks. You can start the check printing procedure using the QuickBooks Banking option. QuickBooks Online Check Printing is possible because Intuit provides desktop and online printing tools. Let’s start.

Print Single QuickBooks Check on Desktop Version
If you want to print only one check, then go with the following steps:
- To begin, open QuickBooks and go to the Banking tab.
- Then, select the Write Checks option.
- Then, locate the check you want to print.
- Then, in the “First Check Number” field, you have to enter the Check Number.
- Now, press the Print button.
- You can select Standard, Wallet, or Voucher here.
- To print the check, select the relevant Printer’s Name in the following step.
- Finally, select the Print option.
If you want to print multiple checks in the QuickBooks Desktop Check Printing, follow the next section.
Print Multiple QuickBooks Checks on the Desktop
- Access QuickBooks in the first steps.
- Then select the Banking tab.
- Then, select the Write Checks tab.
- Now, from the Print icon, look for and pick the Print Later checkbox.
- Close the Write Checks window and proceed to the File tab later.
- Go to Print Forms in the following step.
- Choose from Paychecks and Checks.
- Select the user’s bank account here.
- Mark the checks as ready to print.
- Then, enter the Check Number from the first check.
- To proceed, click OK.
- Now, select the Check Style
- Wallet
- Standard
- Voucher
- Select the Printer’s Name.
- Finally, select Print.
If you have a Mac and want to print checks, then follow the given steps:
Read about:-QuickBooks Error Code 80040408
How to Print QuickBooks Checks in Mac 2021?
Check printing is one of the capabilities included in the 2021 version of QuickBooks for Mac. You can print your checks using the Printer symbol on this operating system. On the Check Screen, click the logo for the Printer. Take a look at the attached photograph. The Check Number must be entered. Then, select the Print option. The steps below describe how to print QuickBooks checks for Mac for the 2021 year:
- From QuickBooks for Mac 2021 Check Screen, locate the “Printer” icon.
- Examine the image related to the “First Check Number to Print” option.
- Mention the “Check Number” of the check you’d like to print now.
- Select “Print” from the menu.
- This will print the chosen check using QB for Mac 2021.
Now, you know how to print the checks in the QuickBooks Desktop version. After this, let’s print the checks in the QuickBooks Online version.
How to Print Checks in QuickBooks Online Version?
After you’ve created a check to pay for expenses, you may print it immediately from QuickBooks Online. You can configure your print settings to print regular or voucher checks. Here’s how to print QuickBooks checks that have already been entered into QuickBooks.
Step 1: Setup QuickBooks for Check Printing
First, you have to make the QuickBooks ready for printing the QuickBooks checks; you can perform it with the following steps: Load some blank paper into your printer for practice prints before you begin. That way, if you need to adjust the check alignment, you won’t waste any actual checks.
- Firstly, choose + New.
- Secondly, Print checks.
- Then, choose Print Setup.
- After that, choose between vouchers and basic checks.
- In the next step, view preview and print sample are both options. Then click Print.
- To finish printing your sample check, pursue the on-screen instructions.
- Put the sample print under a blank check. See if they line up correctly.
Step 2: Add QuickBooks Checks in the Print Queue
Selecting the Print later checkbox or the Print check option while creating a new check adds it to the print queue. You can then print all of your checks at once. To register a handwritten cheque in QuickBooks, follow these instructions. You can alternatively make and print a fresh check by following these steps:
- In the initial step, choose + New.
- Then, check the box.
- Select the Payee from the dropdown menu.
- Select the account from which the check will withdraw funds from the Bank account option.
- After that, fill in the required checkboxes.
- If you want to open the check queue to print now, select the Print check option. If you want to print the check later, choose the Print later checkbox.
- To close the check window, select Save and close. If you need to make another check, save and new.
Step 3: From the Queue Print the QuickBooks Checks
You can now print your checks because they are in the queue. Note: To change the type of check you’re printing (standard or voucher), open the print setup and select the appropriate check type. The following are the steps:
- First, choose + New.
- Then, choose Print checks.
- Now, put your checks through the printer. To avoid wasting checks, print a test print on plain paper beforehand to ensure alignment.
- After that, choose the checking account from which you created the check from the dropdown menu.
- Later, enter the check number of the first check in the printer in the Starting check no. Field.
- Check the box next to each check that you want to print.
- Choose Preview and Print.
- If everything is in order, click Print.
- At last, if your checks print properly, click Done.
Wrapping Up
Now, you know how to print QuickBooks checks. This blog presents you with the steps for printing the checks in the QuickBooks Desktop and Online versions. You can also learn how to print single or multiple checks in QuickBooks Desktop. However, if you face any issues in printing checks, feel free to contact us via Live Chat or Email. Thank You!
1 Comment
QuickBooks Error Code 80040408-7 Methods to Resolve · November 4, 2022 at 7:19 am
[…] Also read:-QuickBooks check printing […]